

… I made a shopping organizer!

Here’s how to make it:
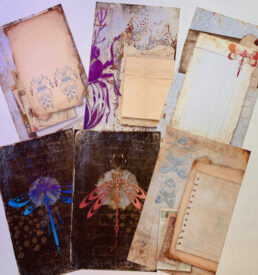
Cut Chipboard to sizes shown. Wrap cover with patterned paper.

Apply patterned paper to inside of covers

For pockets, cut card stock to 4″ x 8″. Score and fold 3/4″ from each end. Attach inside edge of tabs to previous folded card stock to form pockets. I used six pockets.

For front, cut card stock to 4″ x 6 1/2″. Cover with patterned paper and apply to front of pocket group. To “bind” bottom edge, cut a 2 1/2″ x 6 1/2″ card stock or patterned paper strip. Score and fold at 1″ and 1 1/4″. Use edge punch or decorative scissors to finish edge of widest section.

Attach folded binding to bottom of pocket unit, wrapping around to back.

Create a pocket for the bottom of the note pad. Cut card stock 1 1/4″ x 1″ wider than the width of the pad. Cut 1/2″ notches at 2 corners. Score and fold 1/4″ and 1/2″ along sides and bottom. Accordian fold and attach to bottom of right side of inside cover.

Attach a 3/4″ strip by width of inside cover along edges.

Slide back of pad under strip and slip bottom of pad in pocket

For an alternate project, make two pocket units.

This project can work as a shopping organizer, a coupon organizer, or with the double pocket units, as a recipe book or mini album with tags!
Have fun with the project!
Laura


Excactly what I was looking for!My sister asked me to make her something to take notes and I believe this is perfect!Thank you so much Laura!:)
Can’t wait to get home today. I saw this on UTube and decided I had to make one TONIGHT.
Just beautiful! Thanks for sharing!
Awesome!!! I just love this! Bought some papers today to make some as gifts for my co-workers! Thanks for posting this!
Hope you are all safe and warm in the crazy weather you are getting!
OMGOSH Laura!!!! This is sooo awesome….thank you soooo much!!!I am lovin’ this!!
Wishing you a Happy Thanksgiving Laura!
hugs
Brenda
Great Laura! this is beautiful gift for my goddauther, thank you so much. C’est vraiment très joli Laura, je vais faire un petit cadeau à ma filleule, merci beaucoup et passe une bonne journée. Bye…bye…
So awesome!!!! I hope I feel up to making one for me, and one for each of my 3 step-daughters to help them organize their Christmas shopping!!! Such a great idea!!! You are giving us FANTASTIC gifts this holiday season!!! Thank you SO very much for your generosity!!! And Happy Thanksgiving to you and your family!!
Hugs!
Laura, I’ve been trying to think about how to create something similar. Now I don’t have to. Thanks you for saving me so much time! This is just perfect!!!
Thanks so much for the inspiration…I created a modified version for my own receipts and such at home… just posted on 2ps http://www.twopeasinabucket.com/gallery/member/436934-tortagialla/1684949-noteskeeper Love your projects!
Great project for friends and family members. So easy and fast – Thanks!
Laura this was such an awsome idea!! When I saw your video i had to make one… I landed up making 4! One for each lady we are having over for Christmas. I’m stuck now because I don’t have the big post-it notes! I have to wait till I go into town to buy some!