

Here are the photo’s and directions for the
Gatefold Tag Inserts
from yesterday’s What’s Up Wednesday video!

Here’s how to make the tags:
Start with a 4 7/8″ x 10 1/2″ piece of card stock. (This is for a 5 1/2″ square envelope, you will need to adjust your sizes for other sized pockets or envelopes) Score and fold 2 5/8″ from each end.

Holding the two flaps together, punch a half circle in the top of the flaps.

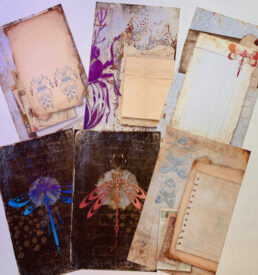
Add patterned paper to the flaps and body of the tag. For the flaps, cut two 2 1/4″ x 4 1/2″ pieces. For the inside and back of the body, use 4 1/2″ x 5″ pieces. Distress if you want. Check out my video of these tags for my “Double Distress” technique.
{CLICK HERE to go to that video}

Add a cool flower (like this ones I used from Prima with a punched flower backer) or another embelly of your choice. This “tag” is a fun option instead of the ol’ single layer flat tags. It doubles your photo/journalling area, too!
Here’s the Slide show of the finished album.


For the tutorials of the cover technique CLICK HERE. For the tutorial of the vellum pages, CLICK HERE.
Have an AWESOME WEEK!!
Laura


Laura –
Just beautiful! What a fantastic album and thank you for the wonderful tutorial!
Elaine Allen
What a great Tag idea! Thanks for sharing.
Love this tag. I hope I can join in tomorrow and Saturday.
I have mainly worked with textiles and stitching my entire adult life but by watching your videos-I look forward to papercrafting. I thank you again Laura and keep up the creative beautiful work
Kathy
This mini album is fabulous! Your creativity is unending!!!! Thanks for all your fabulous ideas. Your a star!