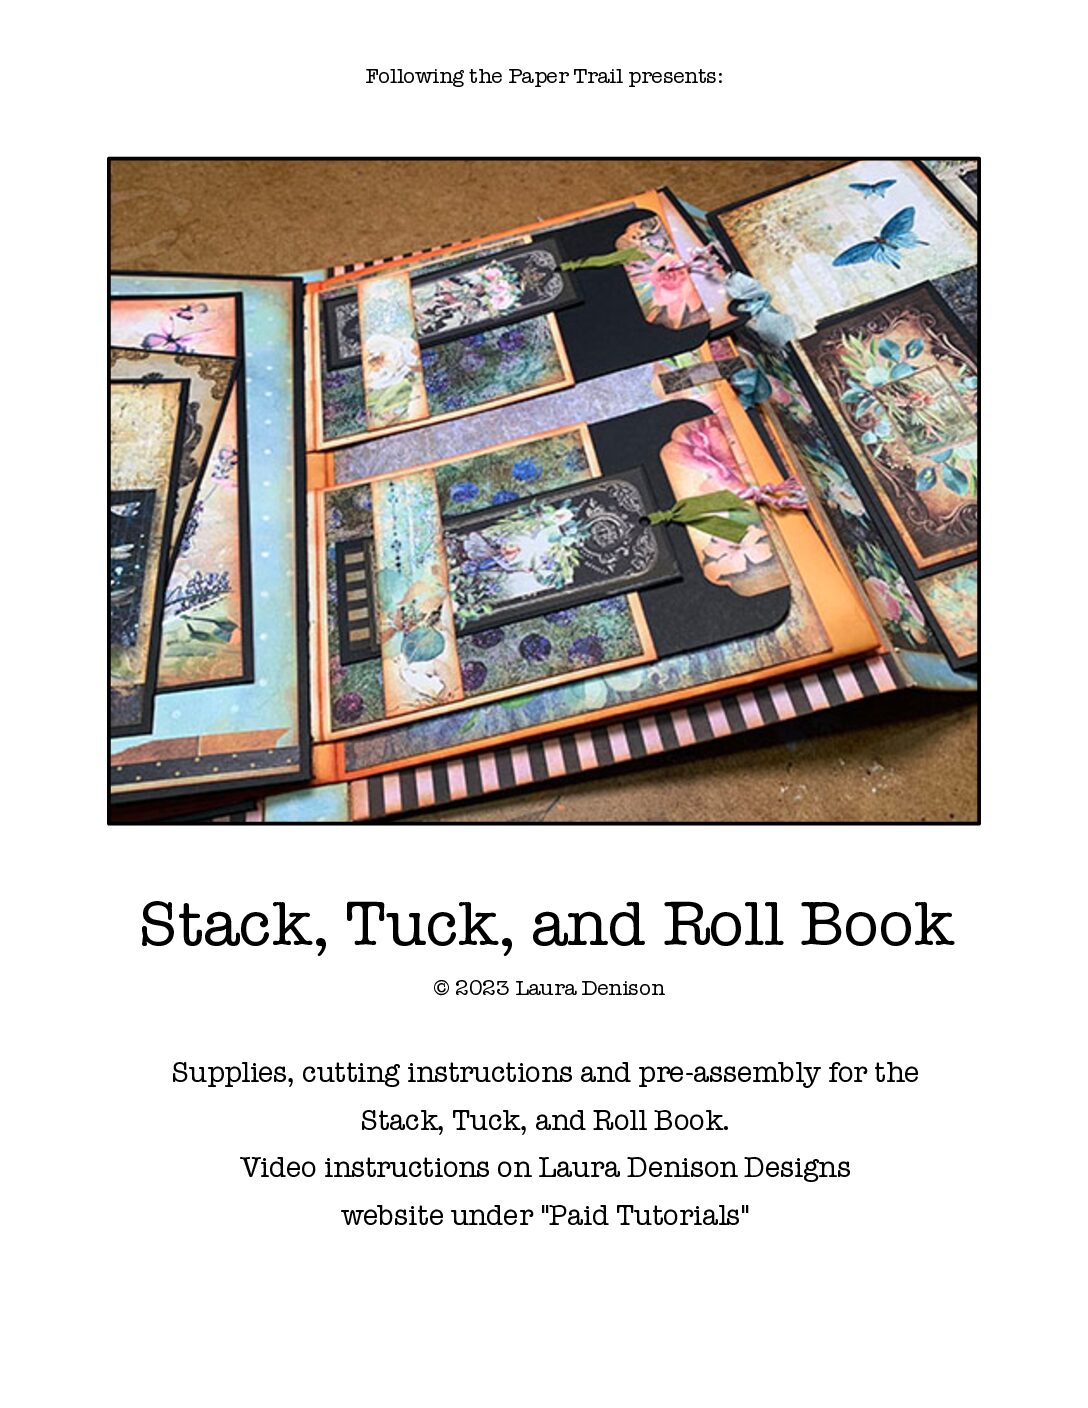
Welcome back! Today I have a new album to share! Here’s how to make an
To make this you will need 6 long envelopes (#10 envelopes). Trim the envelopes to 9″ long. Score and fold 3 1/2″ from one end. I have used envelopes with an end flap. Standard closing envelopes work great as well.
Add strong adhesive near fold on short section of envelope. Allow some space between the fold edge and the adhesive to allow the spine to expand for photo’s and embellishments. Attach short end of envelope to “back” side of the long section of the envelope proceeding it (for the 1st envelope, attach the short section to a 4 1/2″ x 6″ chipboard cover). Continue this for six envelopes. Attach long section of last envelope to the back chipboard cover.
Cut papers as shown below to add to envelopes. Score and fold 3 1/2″ from one end of the 4″ x 6″ Flap sections
Attach papers with your favorite adhesives. The short section of the Flap papers sip inside either the envelope or the shorter pocket.
Use a circle punch to create a finger pull cut-out on the main body of the envelope
Add papers to all six envelopes as well as to chipboard covers. Add tags, photo matte’s and embellishments.
Have fun making your own!


Nice mini you’ve made Laura. I’ve put my copy of your handbagmini on to my blog, so if you want to take a look you’ll know where to find it…………. 🙂
Have a nice week, and I look forward to your upcoming wednesdayproject
Take care,
Jolanda
Love this idea!!!
My gosh you are fun! YOu never fail to come up with something really neat! I was driving home from the grocery store tonight and it dawned on me on the way that it was Wednesday!!! Just like at Christmas, found myself looking forward to checking in to see your new project!! Thanks for sharing your brilliant talent Laura! You really are a day brightener!
man you are just full of awesome ideas! You’re the best 🙂
Another fun project! Thanks for all your great ideas – what is the name of this paper collection? You mentioned it’s a new K & Co but I haven’t seen it anywhere. You are a wonderful designer – thanks again for the ideas and the inspiration! Suzy C
U Ta BESTESTs Gal?????
hehehehe, and I would say that AH?????heehehehee
ArohanuixX
and 1 MUM Xx
Love this project! Awed by your continued generosity. I’m off to find some envelopes.
Thank You Laura
Fantastic version of a mini and as it is difficult sometimes getting hold of the correct paper bags here in the UK. I am so pleased you created this project..envelopes are freely available anywhere and i can see myself making quite a few of these. I love all the pockets and flaps..bit like Dr Who’s tardis..more space on the inside that it looks on the outside. Thank you for sharing your ideas and talent Laura i am having so much fun watching and trying your projects. Jan
Laura!!! Thank you so much for your continued tutorials, and inspiration!! I am working on my paper bag book right now (with the canvas cover). I can’t wait to do the above project, the recipe box, and the flip album!!! Your projects are so well planned out and your instructions are very easily understood. You make my day when I watch your videos and read your blog!!! You are so kind to do this!!!!
Thanks so much again!!!
Lisa Sturgill
Laura!! yet another unique creation!! Your are sooooooo good, I am following your videos on every new project and trying them out. Thank you very very much for sharing all your amazing works!!! Can’t wait till next Wednesday!! 😀
Connie
U ARE THE MINI ALBUM QUEEN ” GURU ” a cut ABOVE the REST.
Arohanui XXxx
Hi Laura, I LOVE all your projects! I agree with Jude–You are the QUEEN of Mini Albums! But, I have a question–I tried to create the plastic bag mini album and can’t get the bags to ‘melt’ properly. I set my iron on a low setting, put the folded bag between two sheets of paper and ironed for about 15 minutes–nothing happened! I’m using Walmart bags. I turned the heat up a bit, but then they curled. I’m not sure what I’m doing wrong. Thanks for your help.
This album is fabulous! I just watched the video & the instructions are great, came to your blog to check it out and I see that we are in the same neck of the woods (I live in Graham). If it’s okay with you, I will be making one of these & featuring it on my websites (with credit and links to you, of course). Might be a while before I get around to it, but I am bookmarking your blog. It’s wonderful!
Rebecca
Stamp4Joy.com
Scrap4Joy.com
Your albums are just so beautiful, I always get so inspired by visiting your blog, amazing work.
Angelica
I love this book–I went out and bought cream colored envelopes today to make one…..what I need to know tho is how did you attach the ribbon? I understand everything else. did you glue under the edge paper that is on the back and front? If you could post the directions for that. I check your blog all the time looking for your new videos. You would be so much fun to take a class from or just sit and watch you work……I am new to this world and often overwhelmed by it all, but none the less–I love it and my scraproom and supplies is growing…..thank you again KH
Gotta make one of these minni’s….I went on line to find the envelopes at the paper zone…I could not find the ones with the flaps like you have shown in you samples…
Do you think I need to contact them personally.
Drop me a line if you wouldn’t mind.
http://www.bloomingideasMI@aol.com
Thanks
Terrific work! Thank you so much for sharing!
I just found this last night, and finished one today. What a clever idea you came up with. I love it!
Michelle
Hi Laura, I am from Turkey and I love scrapbooking. Unfortunately it is not a well known hobby here and it is sometimes impossible to find any scrapbooking materials or products. So most of the time I force my imagination to find suitable objects for scrapbooking. Actually that is the main reason why I have become an addict to your blog and your videos on you tube. While I am watching your videos, I not only learn about your ideas on different projects but also I learn about the products available on the market, see how to use them and the results that come out of them. So you have become a tutor, a source of inspiration and also your videos have become a gate to the scrapbooking products for me. I just want to thank you so much for sharing your marvelous ideas with us.
PS: please excuse my English for I am not a native speaker.
This mini is gorgeous! As is your whole blog! I am so excited to have found you on youtube. What inspiration! Thank you for sharing.
j’aime beaucoup !!! bravo et merci
Your work is absolutely beautiful.
Thank you for sharing your artistic talent with us.
What is the name of the paper you used on the envelope mini album?
I love this mini!! Right up my alley.
Hope
late to the party, just discovered paper trail! love this, gonna try it now!
hello im a 14 years old girl and i don’t forget what 4″ and 6″..(:
so can you say it in cm??(:
thank you:-)